
CREDIT INFORMATION

Due to recent "Cyber Theft" and "Fraudulent Copyright Violations" please contact main office 936-756-0442

EMPLOYEE LIST

For employee information please contact main office 936-756-0442

David Heintz
President
A & H Electric Co.
3505 N. Loop 336 West
Conroe, Texas 77304
Office: (936) 756-0442

Blog

How to Recycle Your Electronics

Recycle Your Electronics

Leaving dated, damaged or non-working electronics on the curb, or tossing them in the trash can for the garbage man to pick up might sound like a good idea, but it’s not the most environmentally friendly nor is it safest option.

Old electronics, such as, televisions, DVD players, VCRs, cell phones, alarm clocks, video games, cameras, and laptops contain heavy metals such as cadmium, mercury and lead which can leach into the ground. This is damaging to the environment.

A Growing Problem

The typical American family own 24 electronic devices [Source: Consumer Technology Association]. At any given time, however, this number may grow or decline. As these products break, they are often replaced with newer models, although it’s not uncommon for people to upgrade some devices annually when the newest flagship hits the market.

2.4 million tons of electronic waste (e-waste) can be found in our landfills. Because landfills are not designed to receive e-waste, the chance of hazardous wastes being released into the environment is higher, and the opportunity to recover precious metals (e.g., aluminum, copper, gold, and silver) in these devices lower.

A Better Choice

A better alternative is to donate it for reuse or drop it off at a recycling center. The U.S. Environmental Protection Agency (EPA) offers many reference tools, from directories of local and government supported drop-off centers to manufacturers’ mail-in recycling and trade-in programs; found on their website. Companies like YouRenew.com will even pay you to recycle your old devices.

Before Donating or Recycling, You Should:

  • Determine if the device can be fixed
  • Delete all personal information from your devices
  • Remove any batteries and/or hard drives from your devices
  • Contact your local recycling facilities, ensuring they accept the device you wish to donate or recycle

Recycle Your Electronics Benefits

There are several benefits to recycling your electronics, including:

  • Creates jobs
  • Frees up landfill space
  • Protects the environment
  • Conserves natural resources
  • Helps others (by donating)

For additional ways you can help the environment, while saving energy and money, we encourage you to read our blog monthly or visit us at www.ahelectric.com.

Save on Utilities

save on utilities

Oftentimes, many Texas families stare dejectedly at utility bills exceeding $100, $200 and sometimes more per month. According to 2014 data from the U.S. Energy Information Administration (EIA), the average monthly electricity bill in Texas is $137.39; among the highest in the nation. Water bills vary depending on city. This is because part of the state has a deregulated utilities market. Though this may be a hard pill to swallow, there are steps you can take to save on utilities.

Turn it Down

One of the easiest ways to save money on utilities is to turn down the heat in the winter and the air conditioner in the summer. Try setting the thermostat to 79 degrees in the summer. During the winter, set it at 68 degrees during the day, turning it down to 65 degrees at night or when you’re planning to be away from home. For additional savings, as well as convenience, install a programmable thermostat.

Turn it Off

It generally takes less than two minutes to walk through the house – depending on its square footage – ensuring all lights, fans and electronics are fully shut off. You may also want to unplug any electronics as well as appliances when they are not being used as they may still draw energy. These devices are called “vampires.” The best thing you can do is to develop a “turn it off” rule in your house.

Keep it Clean

Be sure to regularly clean your air filters. ENERGY STAR recommends changing them monthly or every three months if you invest in high-quality HEPA filters. Clean air filters are critical to the proper performance of your heating, ventilation, and air conditioning system (HVAC), not to mention to your home’s indoor air quality, as well as lowering your monthly heating and cooling costs.

Add Insulation

Inadequate levels of insulation can result in abnormally high energy bills. If you’re not sure why your bill is so high, you may want to invest in an energy audit or at the very least, have an insulation contractor come out to measure your current insulation levels. It is worth the investment! According to this year’s Cost vs. Value report, adding fiberglass insulation to your attic has an average return on investment of 107.7%.

Switch to LEDs

Choose light bulbs carefully. ENERGY STAR rated light emitting diodes (LEDs) use 90 percent less energy than standard incandescent bulbs and last 25 times longer. When you compare them directly with other energy efficient light bulbs – those currently on the market today – you will find that LED is the smartest solution for illumination. They are environmentally friendly as well. No conversion is required.

Making the Switch to LEDs

LEDs

LEDs are extremely energy efficient, consuming 90% less power than incandescent bulbs, and lasting 50,000 times longer. Although these bulbs may have a higher initial cost than more traditional bulbs, like incandescent, the cost is quickly recouped over time in lower electricity costs. These bulbs are also made from non-toxic materials, generate virtually no heat, and are 100% recyclable. If you have been considering making the switch to LEDs, NOW is definitely the best time to do so.

The History of LEDs

In 1878, Thomas Edison developed and patented the first, practical incandescent light bulb. In 1880, he began marketing these light bulbs to the public, doing business under the name of “Edison Electric Light Company.” Over the next several decades, other inventors also created light bulbs, and in 1962 the first practical light-emitting diode (LED) was created and marketed to the public.

In addition to LEDs, more types of energy efficient light bulbs, including the halogen bulb and the compact fluorescent bulb (CFL) were developed. Of the three, LEDs are available in a wide variety of shapes, wattages and sizes to accommodate most any light fixture. Today, the incandescent light bulb is considered obsolete given its relatively low brightness, and high energy consumption.

Environment Friendly

LEDs require very little electrical power to operate. In addition, their operating life is very competitive when compared directly with other types of light bulbs; approximately 50,000 hours compared to incandescent bulbs’ 2,000. Lastly, LEDs tend to generate less heat than other types of light bulbs, which avoids energy loss thus saving you 50 to 80 percent on your utility bills each month

Making the Switch is as Easy as 1-2-3

  1. Visit your local home improvement, hardware, or big box retailer to purchase replacement LED bulbs in the specific size, shape, and wattage you need.
  2. Remove your fixture’s existing light bulb, properly disposing of them.
  3. Install the bulbs. LED bulbs don’t require any conversion kits. They use the same sockets as your old incandescent or compact fluorescent bulbs.

Holiday Lighting Safety Tips

The holiday season is upon us and, as a result many of you may be out late into the night hanging light sets and decorations, in an effort to create a little holiday cheer…and perhaps avoid the family much like Clark Griswold of National Lampoon’s Christmas Vacation.

However, before you go all out, there are several things you should NOT do when it comes to holiday decorating. At A&H Electric, we want you to have a happy and safe holiday season, so we’ve put together a list of safety tips for you to improve your holiday lighting experience.

The Do’s of Holiday Lighting

DO invest in LED (light emitting diode) light sets. While you may have to spend a little more, you’ll definitely save money in the long run, as these light sets cost pennies to run and last twelve times as long as traditional bulbs.

DO always make sure you have someone helping you with your display – especially when you’re using a ladder. Even if it looks like an easy job, hanging holiday lighting really takes two-people; one on the ground to hold the ladder steady and one hanging lights.

Do be a good neighbor. When Clark plugged in his lights, he took out most of Chicago, leaving his neighbors in the dark. Freezing out your neighbors on Christmas Eve probably isn’t the best way to spread holiday cheer.

Do inspect holiday lights. Frayed or otherwise damaged electrical cords should be properly discarded as they are the leading cause of structural fire. Lights with broken sockets should also be discarded because they too pose significant safety hazards. Burned-out bulbs? Swap them out. The risk of an empty socket is too great.

Do use the correct outlets. Any outdoor lighting should be plugged into a ground-fault circuit interrupter, which will automatically cut the power in the event of a short, or a spike in power. You should also use UL rated electrical cords.

Do properly store your light lights and outdoor decorations so you don’t end up with a giant ball of tangled holiday lights next year. You can find power cord holders at virtually any home improvement store or create your own using leftover cardboard.

The Don’ts of Holiday Lighting

Don’t use a staple gun to hang lights. Staples and nails can cause serious damage to your siding, bricks/stucco, and rain gutters. Using these can also cause a fire. Instead, consider specially designed light clips, which are safer to use and easier to install.

Don’t use indoor lights on the exterior of your home. Outdoor lights often burn hotter than indoor lights, and are equipped with water-resistant cords, so don’t use them indoors unless they specify they are indoor/outdoor compatible.

Don’t leave your lights on all hours of the night or when everyone is away from home. In the event a problem develops, it is essential that someone be on hand and alert in order to react quickly, thus thwarting any property damage or personal injury.

How to Eliminate Drafts Around Electrical Outlets

eliminating drafts

Drafts in a home can be more than just unpleasant. They may be an indication of air leaks, which can lead to decreased energy-efficiency, and increased monthly expenditures.

If you are feeling the chill or are simply tired of receiving high electricity bills, and you have already sealed around your doors and windows, checking your electrical outlets and light switches for leaks should be next on your to-do list.

Stopping drafts in their tracks, using the method outlined below, is one of the most cost-effective ways for making your home more energy-efficient – not to mention, more comfortable – thus reducing your monthly electricity bills.

Holes Everywhere

Although, electrical outlet and light switch covers may look innocent enough, they are notorious for harboring drafty boxes – especially in older homes and/or on exterior walls, according to the Department of Energy. How much air escapes through these boxes depends on just how airtight the exterior of your home is: if no air is getting into your wall cavities the problem may be minimal.

Materials Required

To seal up your home, thus increasing your energy-efficiency, purchase inexpensive foam outlet and switch cover seals at your local home improvement or hardware store. Make sure to purchase enough for every outlet and light switch cover in your home along with a couple tubes of high-quality caulk. You can further seal the leaks by buying tamper-resistant receptacles.

Steps for Eliminating Drafts

#1. Remove the outlet and light switch covers.

#2. Run a thin bead of caulk where the box meets the drywall.

#3. While the caulk is still wet, apply the foam seal on top, pressing firmly so that it connects with the caulk. This makes for an airtight seal.

#4. Install tamper-resistant receptacles or spring-loaded outlet covers. These are marketed for both energy-efficiency and child proofing. They’re a win, win!

#5. Don’t want to DIY? Contact a local, licensed, residential electrician.

Childproofing with Tamper Resistant Receptacles

Tamper-resistant receptacles
Image Courtesy of Pixabay

Electrical outlets form a major part of our everyday lives. You can find them in every room of your home. Lamps, phone charges, laptop cables, and power outlets all need to plugged into these outlets. Unfortunately, standard electrical outlets were not designed with children’s safety in mind, thus necessitating the need for childproofing – until now. Tamper-resistant receptacles are designed with your children’s safety in mind. Continue reading to learn more about these receptacles.

What are Tamper-Resistant Receptacles?

Tamper-resistant receptacles have spring-loaded shutters that block access to the contacts unless a 2 prong plug is inserted, helping ensure your child cannot insert an object, such as a hairpin, key, etc. The national electric code now mandates the use of tamper-resistant receptacles, so if your home was built in or after 2014, you may be in luck. There is no guarantee, however, that these were installed so it’s always best to make sure that all outlets are tamper proof.

Why Require Tamper-Resistant Receptacles?

The dangers of objects being inserted into electric outlets is very real. In fact, the National Fire Protection Association reports that each year, approximately 2,400 children are injured when they stick items into the slots of standard outlets (those that are not tamper-resistant). If your outlets are not tamper-proof, you have several options, including electrical outlet caps and sliding plate covers. If you’re open to making some modifications, consider replacing the outlets entirely.

Childproofing Occupied Outlets

Tamper-resistant receptacles, outlet covers and sliding plate covers can keep children safe when nothing is plugged in, but what about when you’re using the outlet? Tugging on a cord presents its own share of problems! Some outlet covers are designed to stop little fingers from tugging on cords. These covers feature a box that encloses the entire outlet plate while allowing room for a plug. Cords feed through holes in one side, letting you keep electronics plugged in without making the outlet vulnerable. Similar covers exist for power strips.

Contact a Local, Licensed Electrician

To make sure all your bases are covered, consider contacting a local, licensed electrician to conduct a full safety electrical inspection of your home. If you have a new home, they can inform you as to whether or not your outlets are tamper-resistant.

DIY Electrical Repair?

DIY electrical repair

Carrying out your own electrical work can be tempting. While DIY electrical repair may work out well when it comes to simpler projects, such as replacing a light switch or repairing a garbage disposal, larger projects require the expertise of a licensed electrician. A prime example of this is installing new wiring.

Aside from the inherent danger of working with electricity, your electrical system is one of the most critical components of your home. Failing to repair it properly can result in an array of extremely costly and even dangerous situations, so if you find yourself asking “Can I repair my electrical system myself?” you may want to reconsider.

Here’s why you should think twice about repairing your own electrical system.

The Process is More Involved Than You Think

While many do-it-yourselfers can easily spot problems, such as a blown circuit or lightbulb, there are often problems with electrical systems that aren’t so readily apparent to the naked eye – especially considering most of the system is hidden in the home’s walls. An electrician knows how to spot signs of trouble and is experienced at ensuring your system functions at its best.

DIY Electrical Repair is Flat-Out Dangerous

Electricity is extremely dangerous. It can cause serious bodily harm if a job isn’t performed correctly. Leave it to the professionals and don’t chance it to save a few bucks. Licensed electricians have considerable knowledge and are trained to implement several safety aspects when working with electricity.

Other issues that can arise from the improper repair of an electrical system include household fires and property damage. According to the National Fire Protection Association, “U.S. fire departments responded to an estimated annual average of 47,820 reported structure fires, involving electrical failure or malfunction.”

Improper connections and unstable wiring systems can also cause home appliances to prematurely age or worse – the wiring inside your home’s walls to fry or melt. In some states, insurance companies will not pay for any damages if electrical work isn’t performed by a professional, licensed and insured electrician.

8 Ways to Lower Cooling Costs in Rising Heat

lower cooling costs

Summer is here and while the temperatures outside are rising, your energy costs don’t have to burn holes in your pockets. Let the experts at A&H Electric show you how to reduce your energy expenses this summer without sacrificing your comfort.

#1. Set the thermostat between 78 to 80 degrees when you are home and up to 85 degrees when you are away. For every degree you set your thermostat above 80 degrees, you can save approximately 2 to 3% on cooling costs.

#2. Install a programmable thermostat. Raising the temperature seven degrees when no one’s home and four degrees at bedtime during the summer, along with proper programming in the winter, can save you more than $180 annually according to Energy Star.

#3. Set your thermostat to “auto.” This makes sure that the fan only runs when the air conditioner is running rather than running 24-hour a day, 7-days a week, as is often the case when the thermostat is set to “on”.

#4. Routinely change your air conditioner’s air filter. Many people install their air filter and forget about it. But when filters become clogged with dirt and dust, you air conditioner has to work harder to ensure your comfort, thus raising your energy bills. You should change or clean you filter once every 30 days during the summer.

#5. Turning lights off when you leave a room is a good way to save energy and, thus, lower your energy bill. Your actual savings depends on the type of lightbulbs you use, according to the U.S. Department of Energy. Remember to get your whole family to perform this money saving task.

#6. Switch to an “off-peak” energy-rate plan. These plans reward customers with reduced pricing for using energy during periods of time considered off-peak. Many electricity companies throughout Texas offer assorted plans.

#7. Seal air leaks. Caulking air leaks can save you up to 20% on your monthly cooling bill. You can also use spray foam. Focus on the windows and doors first followed by electrical outlets, switch plates, vents, electrical or gas service entrances, and attic hatches.

#8. Use ceiling fans throughout your home. Use ceiling fans to cool your home and set your thermostat two degrees higher. During the summer, you should have your ceiling fans running on high with the air blowing down. This will save you the most money while ensuring maximum comfort.

Energy Saving Tips: 5 Ways to Cut Electricity Costs

energy saving tips

Whether you want to slash your energy bill or be more environmentally-friendly, the next five energy saving tips will help

#1. Evaluate Your Energy Use: If you want to cut energy costs, you will first need to know how much energy use you’re using, and when you’re using it. Home energy monitoring systems can provide this information in real time. There are also online tools to aid in the process. The EPA’s Energy Star program, at energystar.gov, offers a set of tools called Home Advisor to assist you in improving your home’s energy efficiency while adding comfort and value. You will need to sign-up for an account to use these tools.

#2. Unplug Vampire Appliances: Vampire appliances use electricity even when they’re “off” by going into standby mode. According to the Department of Energy, vampire appliances and electronics use 4 to 5 percent of the energy in an average home. Vampire appliances include: computers and computer-related equipment, LCD and plasma TVs, surround sound systems, cable or satellite TV boxes, and household items with a clock or LED light (e.g. microwave, DVD player, game consoles, etc.).

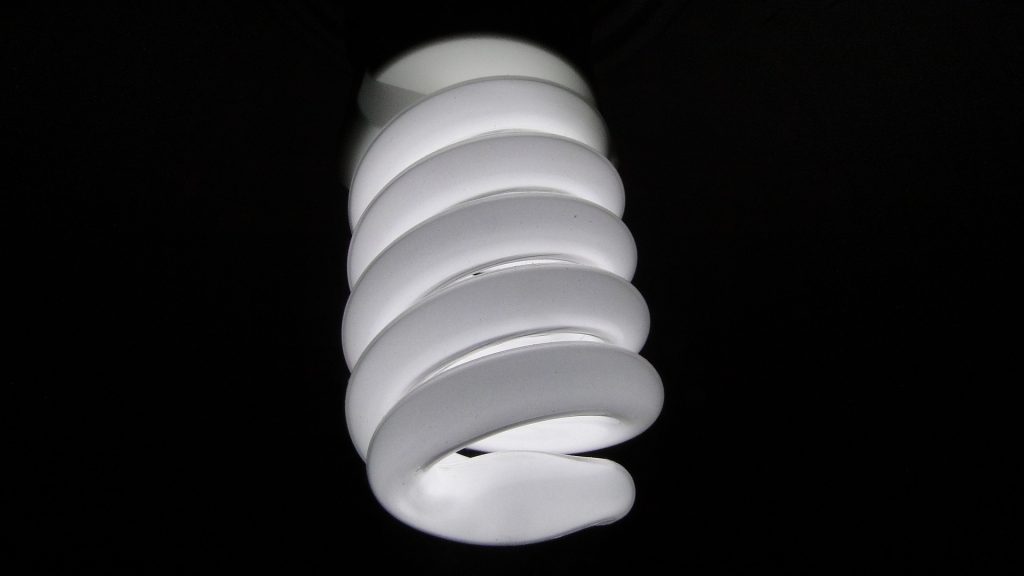
#3. Change Light Bulbs: Changing from incandescent light bulbs to Energy Star qualified light bulbs can have a significant impact on your utility bills and on making your home greener. CFLs are compact fluorescent light bulbs, whereas, LEDs are light-emitting diodes. The electricity savings for a single LED or CFL light bulb is about $6 per year, and $40 for its lifetime, according to the EPA. These light bulbs can also keep your home cooler, thus more comfortable, as they don’t give off heat.

#4. Seal Out the Elements: This can be as easy as installing energy-efficient window treatments or coating the glass with a Low-E window film. In some situations; however, this may not be enough. Some homes may require new windows or insulation. Air sealing your home can significantly reduce air infiltration. Gaps or cracks in your home’s foundation, walls, roof, doors, windows or attic can contribute to high energy costs. Many public utility companies have programs to assist with air sealing.

#5. Improve Your Heating and Cooling System: As much as half of the energy used in your home goes to heating and cooling. Making smart decisions about your heating and cooling system can have a big effect on your monthly energy bills – and your comfort. You should: regularly change your air filter, annually tune-up your HVAC equipment, install a programmable thermostat, seal your heating and cooling ducts, and consider installing Energy Star qualified heating and cooling equipment.